- Define rules for accepting, rejecting, or flagging users.
- Automate decisions based on verification outcomes, risk scores, or compliance requirements.
- Route users to different paths depending on the conditions you configure.
How evaluation works
Evaluation works by assessing the results from previous modules in the journey. Based on the conditions you set, it determines the next step for each user. This section assumes you have created a journey and configured modules that produce outcomes to evaluate. Here’s an example of how evaluation fits into a customer journey: In the image below, the Evaluation node is placed after the Document Classification and Document Authentication modules.
- Document Classified
- Document Classification Mismatch
- Document NOT Classified
- Document Partially Classified
- Low Risk
- Medium Risk
- High Risk
- Failed
- ERROR
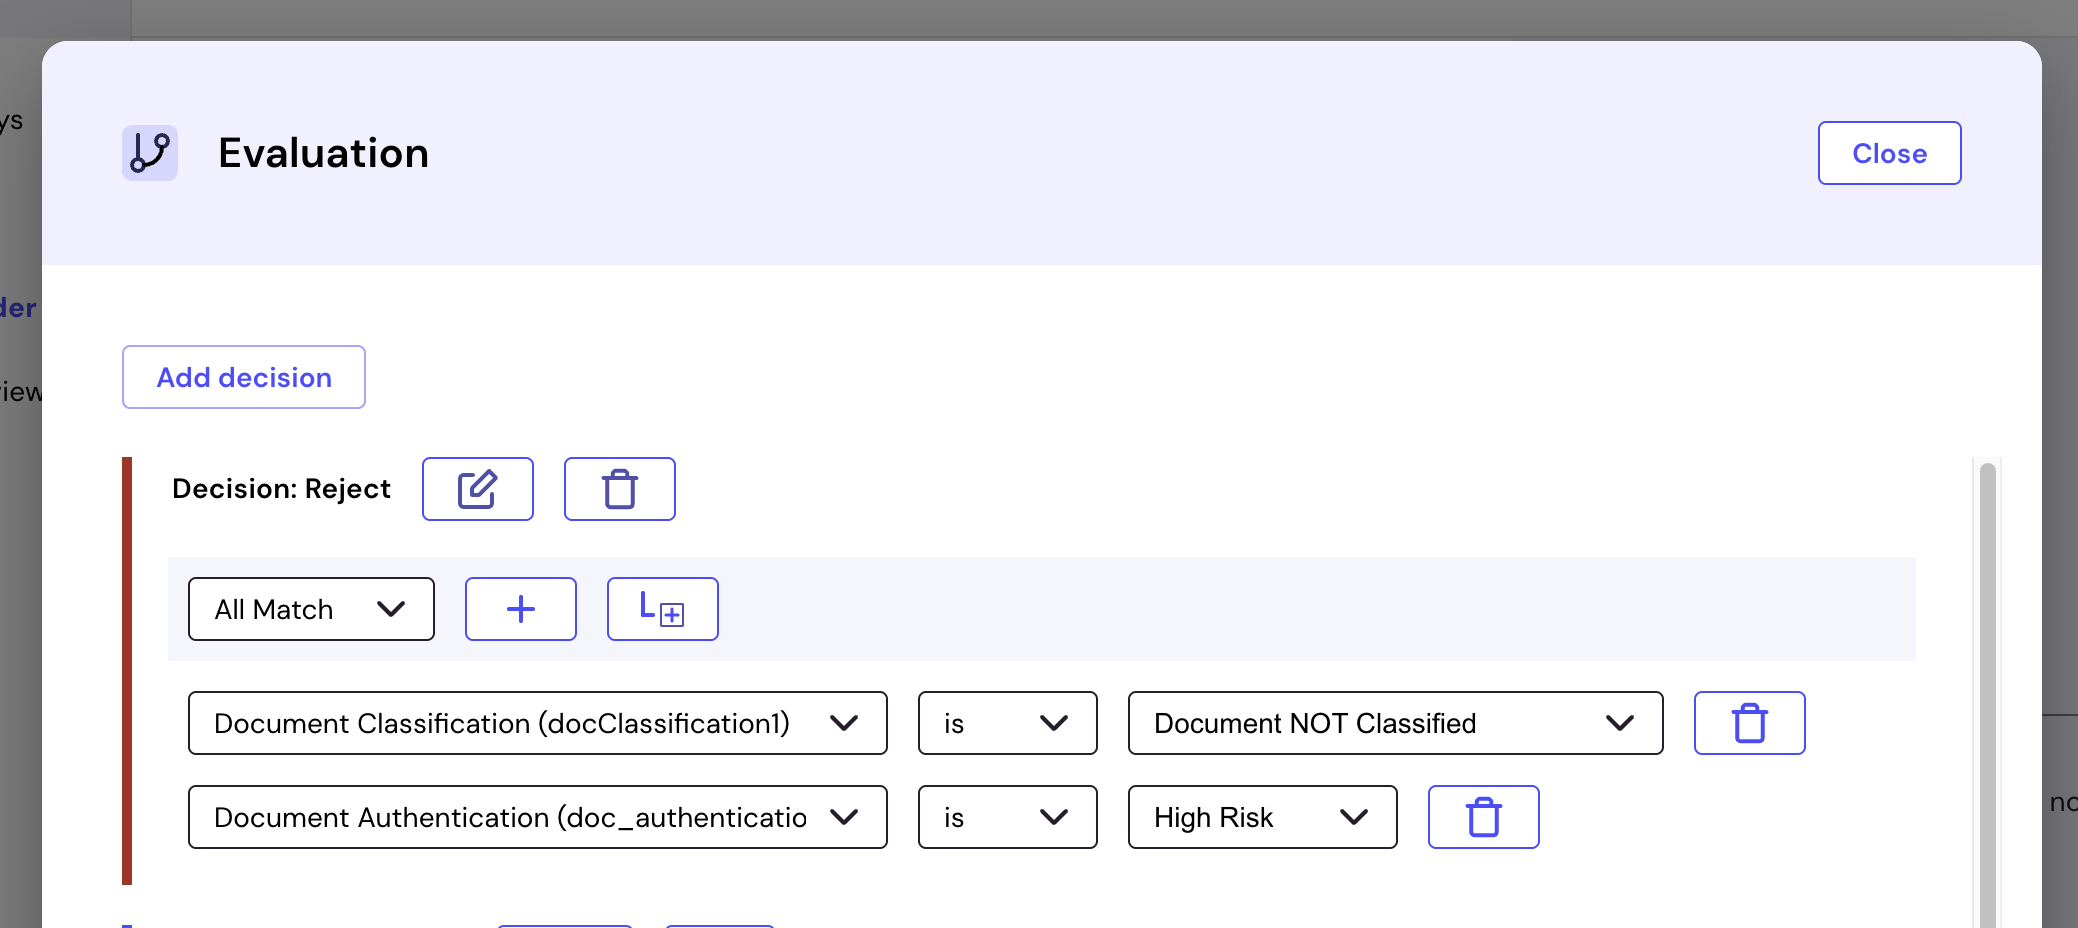
Ensure you set conditions for each decision.
Add evaluation to your journey
Evaluation is used within Routing to determine the next step based on verification results.How to add evaluation:
To add evaluation:- Open your journey in the journey editor.
- Click Browse and add modules in the left sidebar.
- Select the Routing category.
- Inside Routing, select Evaluation and then click Add to journey.
- Connect the Evaluation module to the previous step in the journey.
- Decision: Accept – The user is approved and moves to the next step.
- Decision: Reject – The user does not meet the criteria and exits the journey.
- Decision: Manual Review – The user is flagged for additional checks.
The default decisions can be customized based on your verification requirements. For example, you can rename them or add more decisions as needed.
Configure evaluation rules
After adding the Evaluation module, you must define conditions that trigger different decisions. Properly configuring Evaluation ensures that users follow the correct verification process without unnecessary rejections. To configure evaluation decisions:- Click the Evaluation module inside your journey.
- Click Configure decisions to open the decision settings.
- Click Add decision to create a new condition.
- Select a match condition from the dropdown, such as:
- Verification Passed, for example, “User successfully verified”
- Verification Failed, for example, “Document check failed”
- Fraud Score, for example, “User flagged as high-risk”
- Click the + icon to add multiple conditions if needed.
- Define an outcome for each condition:
- Accept – The user continues to the next step.
- Reject – The user is removed from the journey.
- Manual Review – The user is flagged for further verification.
- Click Save to apply the decision logic.
Example use case
A customer uploads an identity document for verification:- If the document is valid, they move forward.
- If the document is flagged as fraudulent, they are rejected.
- If the document is unclear, they go to manual review.
What’s next?
After configuring Evaluation, you need to publish your journey.- Publish journeys – Deploy your journey after configuring evaluation rules.