Why use webhooks in your journey?
The Webhook module enables you to:- Integrate with existing external systems: Automatically update your other applications when a customer completes verification.
- Monitor journey progress: Receive real-time notifications about the customer onboarding status.
- Customise notifications: Tailor the webhook payload to include relevant information for your use case.
- Log events: Log verification events for compliance or auditing purposes.
The Webhook module can’t determine if a journey has been completed because the module itself is still running when it sends data. To ensure accurate journey status information, place the webhook as the last module in your journey, just before the “End of journey” node.
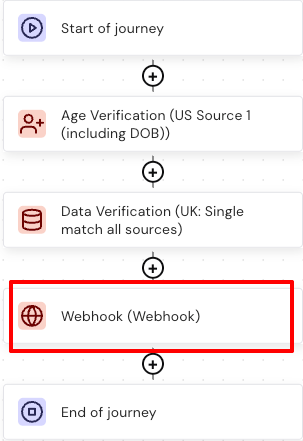
Add a Webhook module to your journey
To add a Webhook module:- Open your journey in the journey builder.
- Click Browse and add modules.
- Type “Webhook” into the search bar. You can also locate the Webhook module in the utilities module library category.
- Select the Webhook module.
- Click Add to journey.
- Ensure the Webhook module is the last step before the end of your journey.
Configure the Webhook module
After adding the Webhook module to your journey, you need to configure where notifications should be sent and what information they should contain.The webhook supports credentials to authenticate with external endpoints that require it. You can use either username and password or API keys. When a username and password are supplied, the credentials use the
Authorization: Basic header with the supplied username and password base64 encoded. When an API key is supplied, you can choose the header to send. When Authorization: Basic is chosen, the supplied API key will be base64 encoded.- Click the Webhook module in your journey. The Webhook configuration panel opens.
- Click Settings. The settings window appears with the following fields:
-
Preview settings fields:
- Preview URL: Enter the webhook URL where you want notifications to be sent to when previewing or testing journeys. This allows you to test webhook functionality without affecting your production environment.
- Preview Username: The username for basic authentication (optional).
- Preview Password: The password for basic authentication (optional).
- Preview API Key: The API key to use for authentication (optional).
- Preview Auth Type for API Key: The authorization header to use when using an API key. Options include:
X-API-Key(default): Sends the API key unencoded in theX-API-Keyheader.Authorization: ApiKey: Sends the API key in the Authorization header.Authorization: Basic: Base64 encodes the API key before sending.Authorization: Bearer: Sends the API key as a Bearer token.
-
Production settings fields:
- Production URL: Enter the webhook URL where you want notifications to be sent to when in the production environment. This is the live URL that receives real customer verification events.
- Production Username: The username for basic authentication (optional).
- Production Password: The password for basic authentication (optional).
- Production API Key: The API key to use for authentication (optional).
- Production Auth Type for API Key: The authorization header to use when using an API key. Options include:
X-API-Key(default): Sends the API key unencoded in theX-API-Keyheader.Authorization: ApiKey: Sends the API key in the Authorization header.Authorization: Basic: Base64 encodes the API key before sending.Authorization: Bearer: Sends the API key as a Bearer token.
-
Additional settings:
- Include message: Enable this setting to send a custom message in the webhook payload. When enabled, the Message field accepts message inputs. When disabled, the Message field goes grey and can’t accept inputs.
- Message: Message input field for typing in any message that aligns with your use case, for example, “Customer verification completed.”
- Timeout: Set the maximum time the webhook module will wait for a response from your webhook URL using ISO 8601 duration format, for example, PT5M = 5 minutes.
The custom message field is optional. If you don’t need to send additional context with your webhooks, leave the Include message toggle off.
- Click Save all settings.
Webhook outcomes
The Webhook module provides status information about message delivery:| Outcome | Description |
|---|---|
| Sent | The webhook message was successfully sent to the specified URL. |
| Error | There was an error sending the webhook message. Common causes include network failure, invalid URL, timeout exceeded, or server unavailable. |
Like any other module, Webhook modules can be configured. For more information about module configuration, refer to How to configure module outcomes in GO.
What the webhook sends
When the Webhook module executes, it sends an HTTP POST request to your configured URL containing journey information and status data. The notification includes:- Journey instance identifier
- Current journey status
- Timestamp of when the webhook was triggered
- Custom message, if Include message is enabled
- Journey outcome and decision data
Example: Test the Webhook module
For this example, we’ll be using a free webhook site called webhook.site to get a webhook URL for testing in a preview and production environment.- Go to webhook.site and copy the unique webhook URL generated for you.
- Paste the webhook URL into the Preview and Production URL field in your webhook settings window.
- Click Save all settings.
- Publish your journey to the Preview or Production environment.
- Start a test journey instance by sending a POST request to the
/start/journeyAPI endpoint. For more details on how to start a journey, see the Start a journey guide.
Validating credentials
If you configured credentials for your webhook, you can verify they were sent correctly in webhook.site:- No credentials: Nothing additional to check.
- Username/Password or API Key with Authorization header: Look for the
authorizationheader in the request. You should see the header type (Basic, Bearer, ApiKey). If the authorization type is Basic, the credentials will be base64 encoded. For username and password, they will be separated by a:. - API Key with X-API-Key header: Look for the
x-api-keyheader rather thanauthorization. The API key will not be encoded.
Troubleshooting
If you encounter issues with the Webhook module, consider the following troubleshooting option:- Verify the URL: Ensure the URL you provided is correct and accessible from the internet. Test it using tools like Postman or curl.