

If your journey has a step that your customer must complete, then the Create bulk launch action is unavailable. See When the Create bulk launch action is unavailable.
How a bulk launch works
A bulk launch has the following characteristics:- No customer interaction: Each row runs as a separate journey and goes straight to a decision. Your customers don’t see any screens, and the journey doesn’t wait for them.
- Documents and biometrics supported: A row can include attachments, so the journey can run document and biometric checks as well as data checks.
- Runs on the server: The GBG Go platform processes the rows in the background. The bulk launch continues when you close the browser tab or go to another page.
- Results in Investigation: You create a bulk launch from the journey. You follow its progress and review the outcome of each row on the Bulk launches page in Investigation.
- Fixed once it runs: You can’t change a bulk launch or run its rows again. To correct rows that failed, fix them in your CSV file and create a new bulk launch.
Before you begin
Ensure you have the following:- A journey published to the environment that you want to run it in.
- A role that includes the bulk permission. The permission to start a single journey doesn’t include it. If you don’t have this role, then contact GBG support.
- The customer data for the journey, ready to add to a CSV file.
Open the Create bulk launch dialog box
You can open the Create bulk launch dialog box from the Dashboard or from the Bulk launches page of the journey. To open the dialog box from the Dashboard:- In the GBG Go platform, open your journey, and then click Dashboard.
- Click the Actions list for the environment that you want to run the journey in.
- Click Create bulk launch. The Create bulk launch dialog box appears.
- In the GBG Go platform, open your journey, and then click Bulk launches.
- Click Create new bulk launch.
- Click Production or Preview. The Create bulk launch dialog box appears.
Prepare your CSV file
Each journey has its own CSV template. The template contains the exact column headers that your journey version expects, so you don’t need to work out the column names yourself. To prepare your CSV file:- In the Create bulk launch dialog box, click Download the template for this journey.
- Expand Columns this journey needs to see every column and how many of them the journey requires.
- Add one row to the template for each journey that you want to run.
- Save the file in CSV format.
Your CSV file must meet the following requirements:
- Use UTF-8 character encoding.
- Use a comma as the delimiter.
- Keep the column headers exactly as they appear in the template.
- Contain at least one row of data. A file that contains only headers has no rows to run.
- Keep leading zeros in values such as postal codes, phone numbers, and identifiers. In a spreadsheet, format these cells as text.
Create and run a bulk launch
To create and run a bulk launch:-
In the Create bulk launch dialog box, select the options for your use case. The dialog box contains the following options:
The region controls where the platform processes and stores your customers’ data. Change it only if your organisation runs journeys in more than one region.
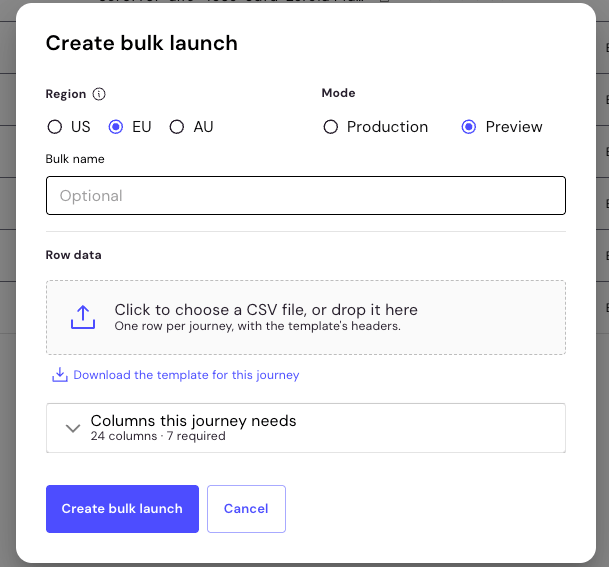
Create bulk launch dialog box
- Under Row data, click the upload area and select your CSV file, or drop the file onto the area.
-
Click Create bulk launch.
The dialog box shows the filename, the number of rows, and how many rows are ready to run. You can no longer change the region or the mode. To use a different file, click Replace.
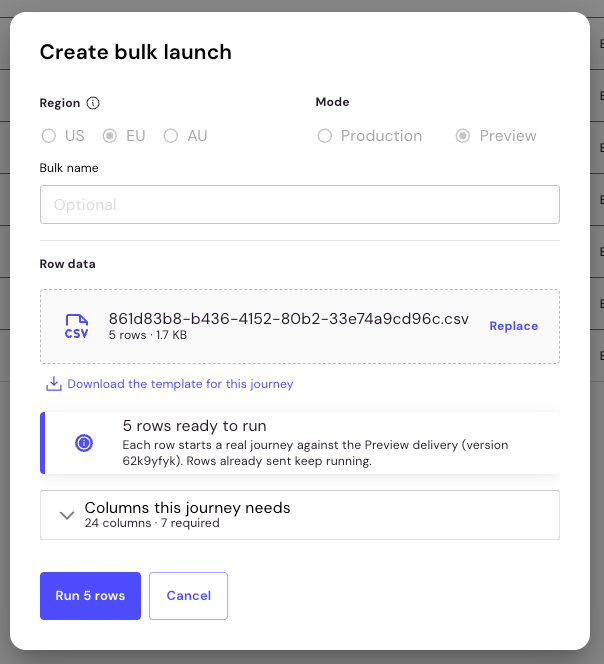
Create bulk launch dialog box with five rows ready to run
- Click Run rows. The button shows the number of rows that it runs, for example Run 5 rows.
- The file contains every required column.
- The file contains no unknown column headers.
- The values in each row use the expected format.
Monitor a bulk launch
The Bulk launches page of the journey lists every bulk launch created for the journey. The progress and outcomes of each bulk launch are in Investigation.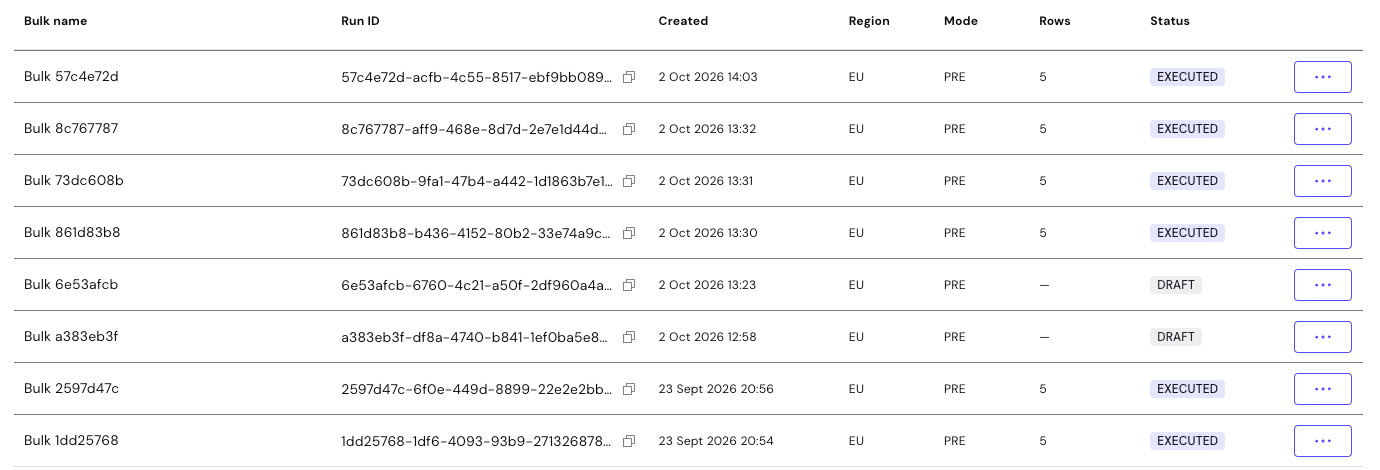
Bulk launches page of a journey
To follow the progress of a bulk launch:
- In the GBG Go platform, open your journey, and then click Bulk launches.
- Find your bulk launch in the table.
- Click ⋯ in the row of the bulk launch, and then click View results. The bulk launch opens on the Bulk launches page in Investigation.
View a bulk launch
The bulk launch page shows the settings of a bulk launch and the file that it runs. To open the page, click the bulk name in the table on the Bulk launches page.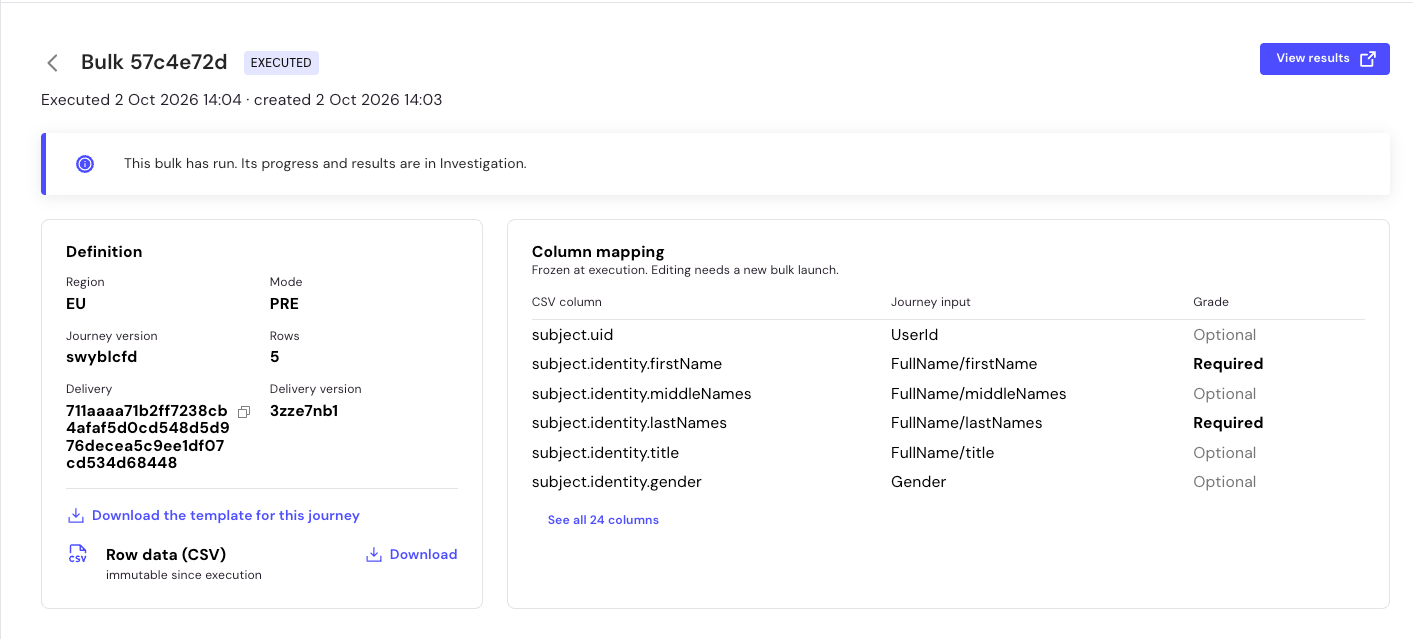
Bulk launch page
The Definition panel contains the following fields:
Under the fields, you can download the template for the journey and the CSV file that the bulk launch uses. To download the CSV file, click Download next to Row data (CSV).
The Column mapping panel shows the first few columns of your CSV file. To see every column, click the See all link, for example See all 24 columns.
You can’t change the CSV file or the column mapping after the bulk launch executes. To make a change, create a new bulk launch.
Stop a bulk launch
You can stop a bulk launch while it’s queued or running. When you stop a bulk launch, the following happens:- Rows that the platform has already sent to a data provider finish as normal.
- The platform skips rows that haven’t started.
Automatic stop after repeated server errors
The platform stops a bulk launch automatically when server errors suggest a wider problem. This protects you from the cost of a run that can’t complete. The platform stops sending rows when both of the following apply:- 20 or more rows have failed with a persistent server error.
- Those rows make up 20% or more of the rows processed so far.
Data storage and retention
The platform stores uploaded files and row results separately for each organisation and each region. The standard GBG Go data retention policies apply to them. To learn more, see Manage data retention policies.When the Create bulk launch action is unavailable
The Create bulk launch action is unavailable when the journey includes a step that your customer must complete. A bulk launch has no customer present, so the journey can’t finish. To use bulk launch, remove the step that your customer must complete from the journey, and then publish the new version.Next steps
- To review the progress and rows of a bulk launch, see View bulk launches.
- To check the data that your journey accepts, see How to determine field structure for submission.
- To publish your journey to the production environment, see Publish journey.
- To send a hosted journey to a single customer, see No-code quickstart.