Documentation Index
Fetch the complete documentation index at: https://docs.go.gbgplc.com/llms.txt
Use this file to discover all available pages before exploring further.
Overview
This quick start guides you through the following:- Log in to GBG GO dashboard.
- Create your first customer journey.
- Configure and publish your journey.
Before you start
Before completing this quickstart, make sure the following prerequisites are complete:- Your GBG GO organisation account has been created by GBG internal team.
- You have received a welcome email confirming your account creation.
The login credentials for your GBG GO dashboard are different from your API credentials. The API credentials are separately provided by your GBG account manager. These credentials are used for programmatic access to the GBG GO APIs’ while the dashboard login is for the web interface.
Step 1: Log in to GBG GO
This section guides you through accessing GBG GO for the first time.- Navigate to the GBG GO sign-in page and then click Customer Sign In.
- Enter your email address and then click Log In.
- On the next screen, click Forgot your password? A recovery code is automatically sent to your email.
- Enter the recovery code and create your new password.
- Click Change password to complete the setup.
- Log in with your email and new password.
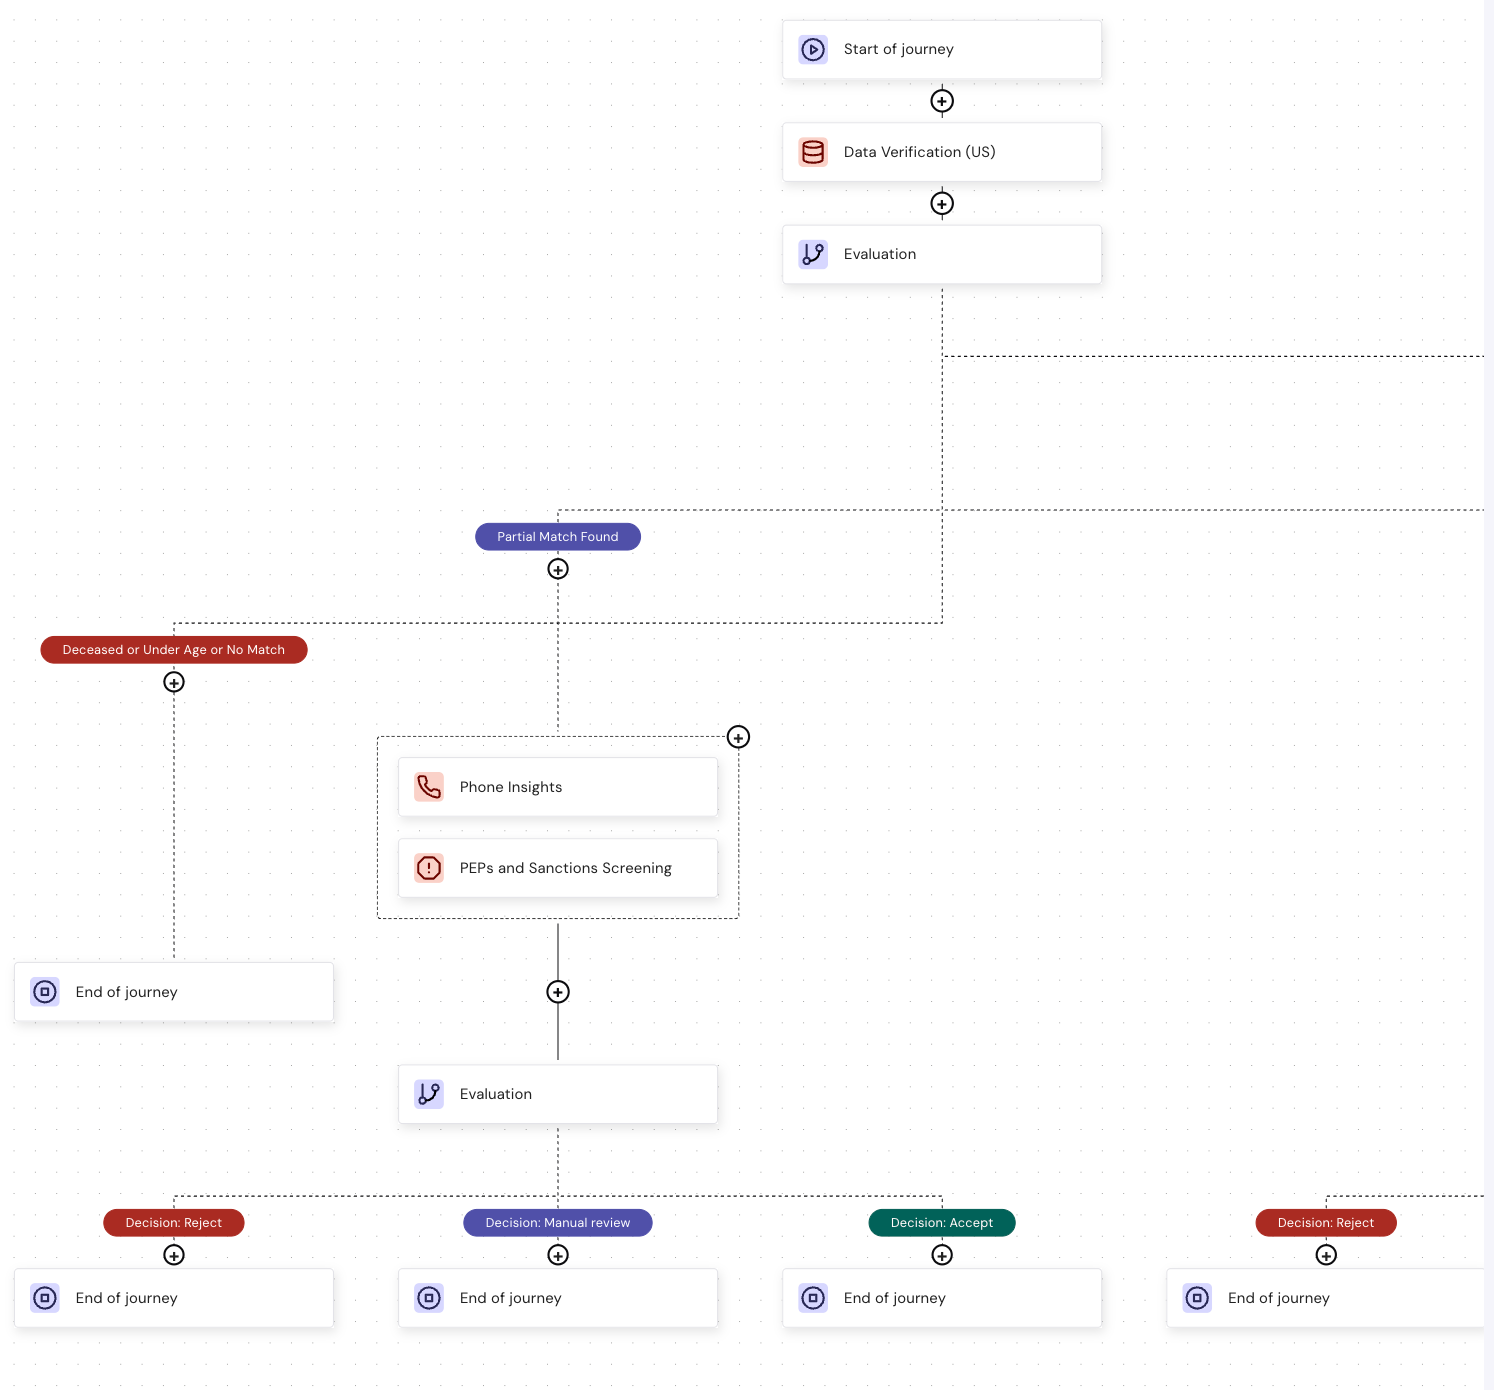
Step 2: Create your first customer journey
This section walks you through creating a customer journey using a pre-configured template, which is the fastest way to get started.- Click the Create a new journey list.
- Select Explore templates.
- Browse through the templates.
- Select a template according to your use case.
- Review the template pre-configured settings and modules.
- Click Use this template to load it into the editor.
- Modify the journey by customizing modules, routing, and evaluation steps.
Step 3: Modify modules
This section shows you how you can modify your modules.- Select a module on the template.
- Modify required fields such as:
- Label
- Outcomes
- (Optional) Add or remove modules.
- (Optional) Add routing and evaluation logic to the modules.
Step 4: Publish journey
This section shows you how to publish your journey. You can publish your journey to a preview or production environment.Publish to preview/sandbox environment
Click Publish to Preview in the journey editor. You then get a confirmation message: Delivery deployed successfully. Next, click Dashboard to see:- Environment (Preview)
- Version number
- Resource ID
- Last published
- Schema for API integration
Publish to production
- Click Dashboard.
- Click the Actions list.
- Select Publish to Production from the menu.
- Select the confirmation checkbox.
-
Click Publish to production. You will receive a pop-up message saying, Delivery deployed successfully to production. In the dashboard, you can see:
- Environment (Production)
- Version number
- Resource ID
- Last published
- Schema for API integration