> ## Documentation Index
> Fetch the complete documentation index at: https://docs.go.gbgplc.com/llms.txt
> Use this file to discover all available pages before exploring further.
# Configure modules
> Add and configure verification modules in your GBG GO journey including setting up outcomes, rules, and module connections.
Once you create a journey in GBG GO, you need to configure it by adding modules, defining rules, and setting conditions to control the workflow.
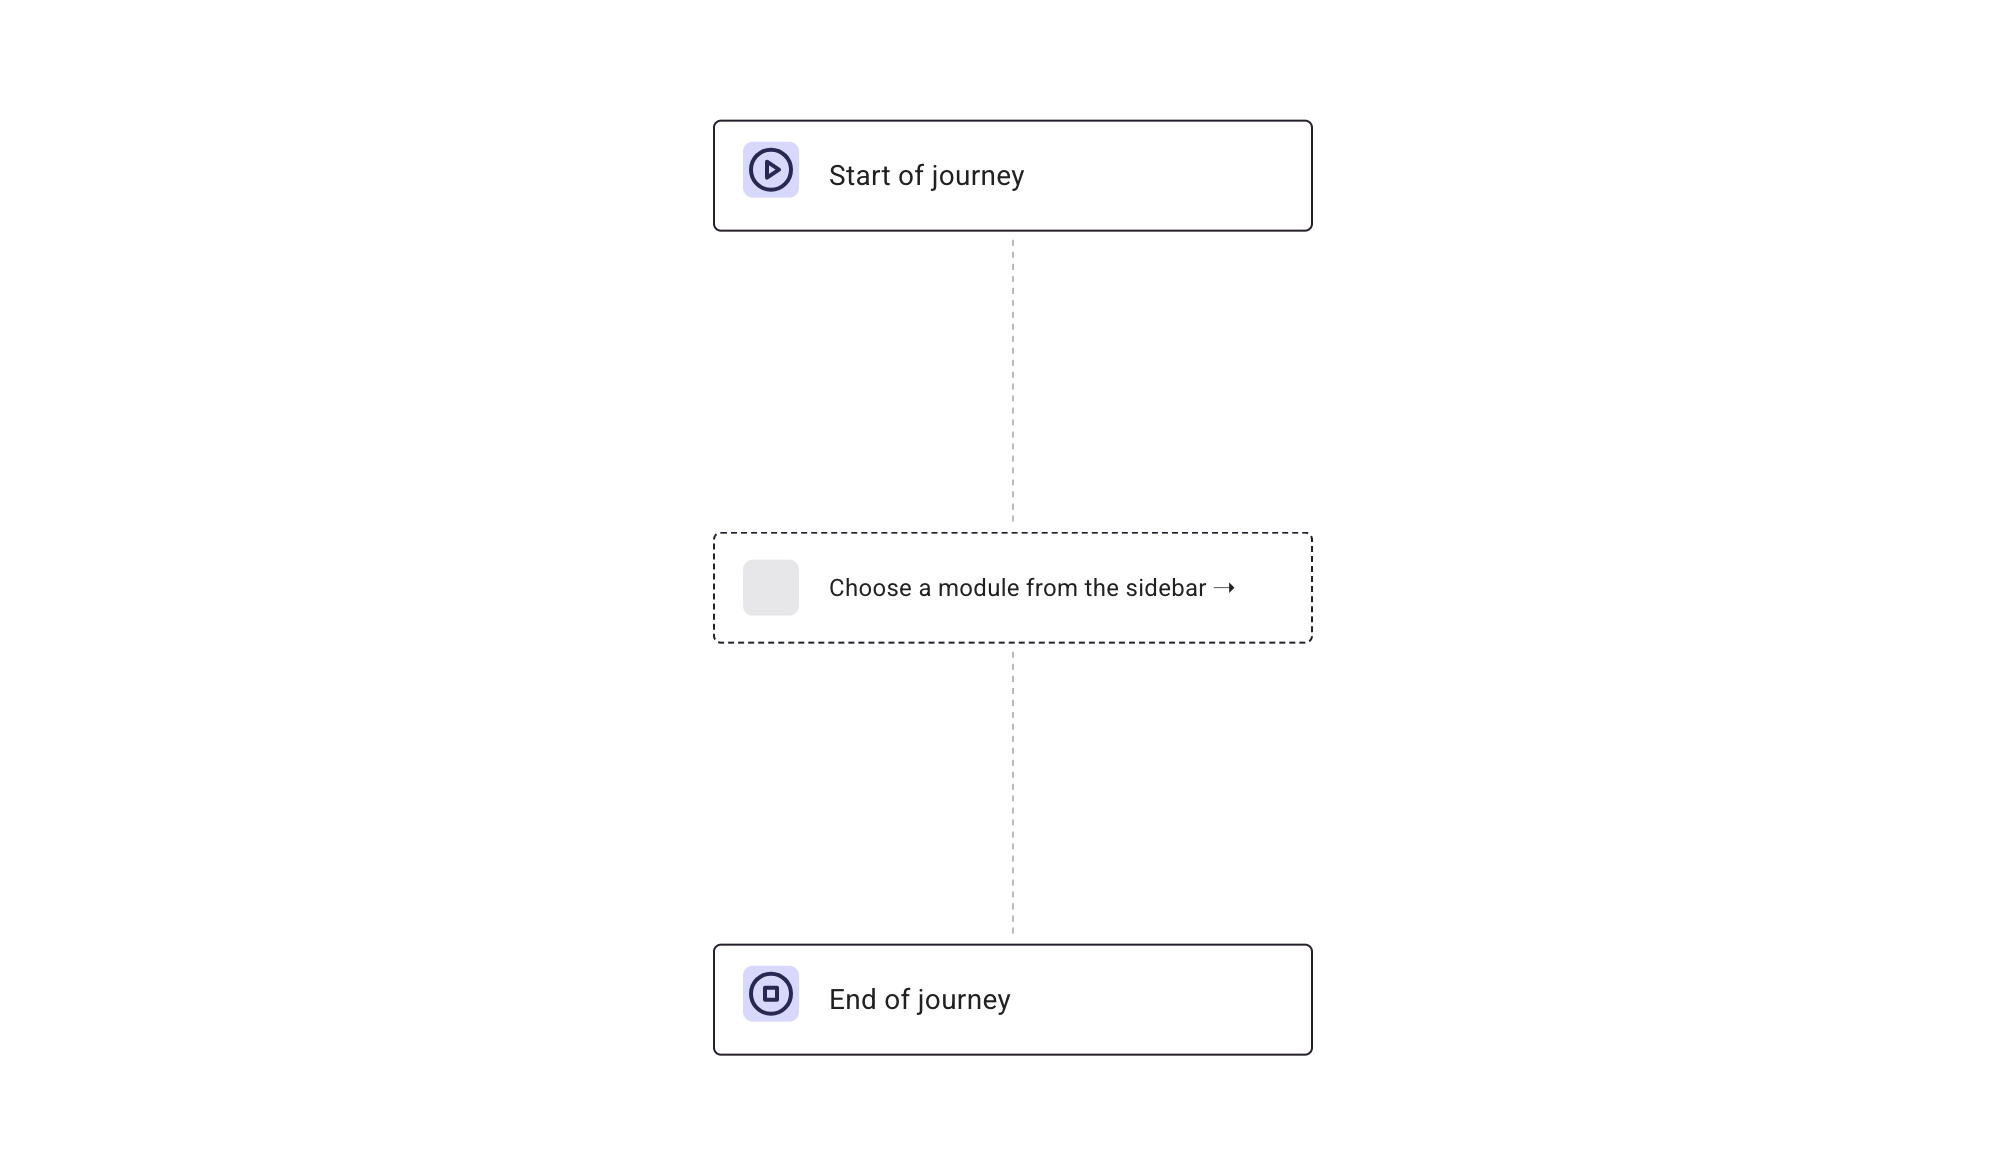
A journey consists of:
* **Start node** – The entry point of the journey, labeled **"Start of journey"**.
* **Modules** – The verification steps a customer goes through.
* **End node** – The final step of the journey, labeled **"End of journey"**.
 ## Add modules
Modules define what happens at each stage of the journey. Each module performs a specific function, such as identity verification, fraud detection, or decision-making.
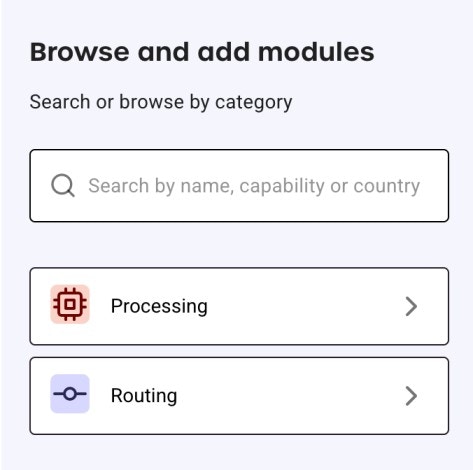
To find modules, you can either select the "Processing" category that will open up a long list of modules and variants, or you can use the search bar to search directly for modules and variants.
Follow these steps to add a module:
1. Go to **Browse and add modules** in the left sidebar.
## Add modules
Modules define what happens at each stage of the journey. Each module performs a specific function, such as identity verification, fraud detection, or decision-making.
To find modules, you can either select the "Processing" category that will open up a long list of modules and variants, or you can use the search bar to search directly for modules and variants.
Follow these steps to add a module:
1. Go to **Browse and add modules** in the left sidebar.
 2. Use the search bar to find a module by:
* Module name, for example, "Data Verification"
* Capability, for example, "Age Verification"
3. Click the module that you want to add.
2. Use the search bar to find a module by:
* Module name, for example, "Data Verification"
* Capability, for example, "Age Verification"
3. Click the module that you want to add.
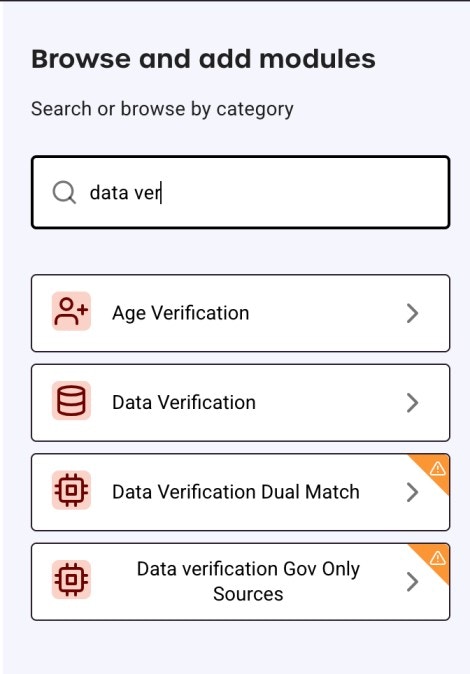 The orange warning icon indicates that the module is not licensed or included in your contract and requires activation by the GBG team.
4. Click **Add to journey** to insert it into your workflow.
The orange warning icon indicates that the module is not licensed or included in your contract and requires activation by the GBG team.
4. Click **Add to journey** to insert it into your workflow.
.jpg?fit=max&auto=format&n=wtQrQDGWEOTCei9M&q=85&s=e6920bd100d7216a4eed76cea16bad34) Your newly added module would fall in-between the Start node and the End node:
Your newly added module would fall in-between the Start node and the End node:
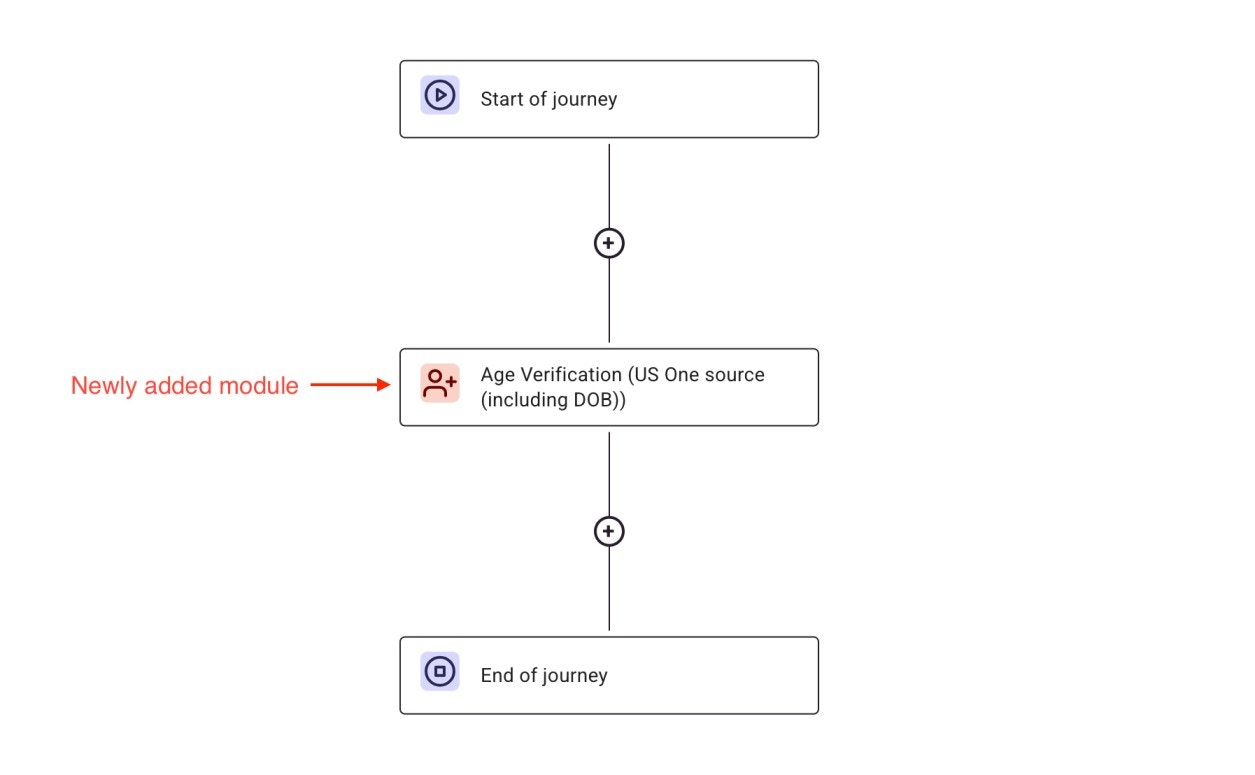 5. To add more modules to the journey, click the "**+**" sign in the journey.
Modules that require specific configurations will prompt you to complete
additional fields before saving.
## Configure modules
Once a module is added, it needs to be configured to function correctly. Each module has unique configuration settings. Some require input data, while others rely on predefined conditions to determine the next steps.
To configure a module:
1. Click the module inside the journey editor.
2. Review the module’s available settings and options.
3. Modify the required fields (for example., label, variants, outcomes).
5. To add more modules to the journey, click the "**+**" sign in the journey.
Modules that require specific configurations will prompt you to complete
additional fields before saving.
## Configure modules
Once a module is added, it needs to be configured to function correctly. Each module has unique configuration settings. Some require input data, while others rely on predefined conditions to determine the next steps.
To configure a module:
1. Click the module inside the journey editor.
2. Review the module’s available settings and options.
3. Modify the required fields (for example., label, variants, outcomes).
 4. Click **Configure outcomes** to define outcomes. Outcomes determine what happens based on the module's results.
To learn more about configuring module outcomes, refer to the [How to configure module outcomes in GO](/docs/go-v1/guides/product-guides/configure-outcome-decisions) documentation.
## Delete modules
To delete a module from your journey:
1. Right-click the module you want to delete.
2. Select **Delete** from the context menu.
## What’s next?
After configuring your journey, the next step is to define decision logic and publishing options.
* **[Set up routing](/docs/go-v1/platform/journey-builder/set-up-routing)**: Define conditions that change a journey's path.
* **[Set up evaluation](/docs/go-v1/platform/journey-builder/set-up-evaluation)**: Add decision points like accept, reject, or manual review.
* **[Publish journeys](/docs/go-v1/platform/journey-builder/publish-journey)**: Deploy your journey for testing or production.
4. Click **Configure outcomes** to define outcomes. Outcomes determine what happens based on the module's results.
To learn more about configuring module outcomes, refer to the [How to configure module outcomes in GO](/docs/go-v1/guides/product-guides/configure-outcome-decisions) documentation.
## Delete modules
To delete a module from your journey:
1. Right-click the module you want to delete.
2. Select **Delete** from the context menu.
## What’s next?
After configuring your journey, the next step is to define decision logic and publishing options.
* **[Set up routing](/docs/go-v1/platform/journey-builder/set-up-routing)**: Define conditions that change a journey's path.
* **[Set up evaluation](/docs/go-v1/platform/journey-builder/set-up-evaluation)**: Add decision points like accept, reject, or manual review.
* **[Publish journeys](/docs/go-v1/platform/journey-builder/publish-journey)**: Deploy your journey for testing or production.